How to create Followers Component with Follow functionality Using TailwidCSS


Social media are interactive technologies that facilitate the creation and sharing of information, ideas, interests, and other forms of expression through virtual communities and networks.
One of the amazing features social media offers is the ability to connect with people, and make new friends and sometimes even future colleagues. But Generally, before becoming friends or getting to know each other, you usually have to do a Friend Request or As in most platform, You have to Follow the person.
This feature allows you to build a solid and strong network of people in your field and beyond. It also permit you to surround yourself with like-minded indivuduals that help you stay motivated and focus. All social media offer this feature, you can see it on Facebook, Twitter, LinkedIn etc.
Together, we are going to build one of this Functional Followers components, that you can include in your next project, or add to you skills sections of your portfolio.
Let's begin!
Understanding the Task
This is component component is easy that it looks like. Basically, we are different Social Media Profiles, which you can press the follow the button and add the person to you list of people. So what we will be doing in this task, is create small profile list (stored in an array of Objects), and also add the follow/unfollow functionality.
Easy peasy right?
Structure of Code
Our code will be divided into two parts. we will have the HTML part, with all the styling done with TailwindCSS of course, then we will also have a JavaScript file that contains our data to be displayed, and also has the code for the Follow/Unfollow funtionality.
HTML + TailwindCSS
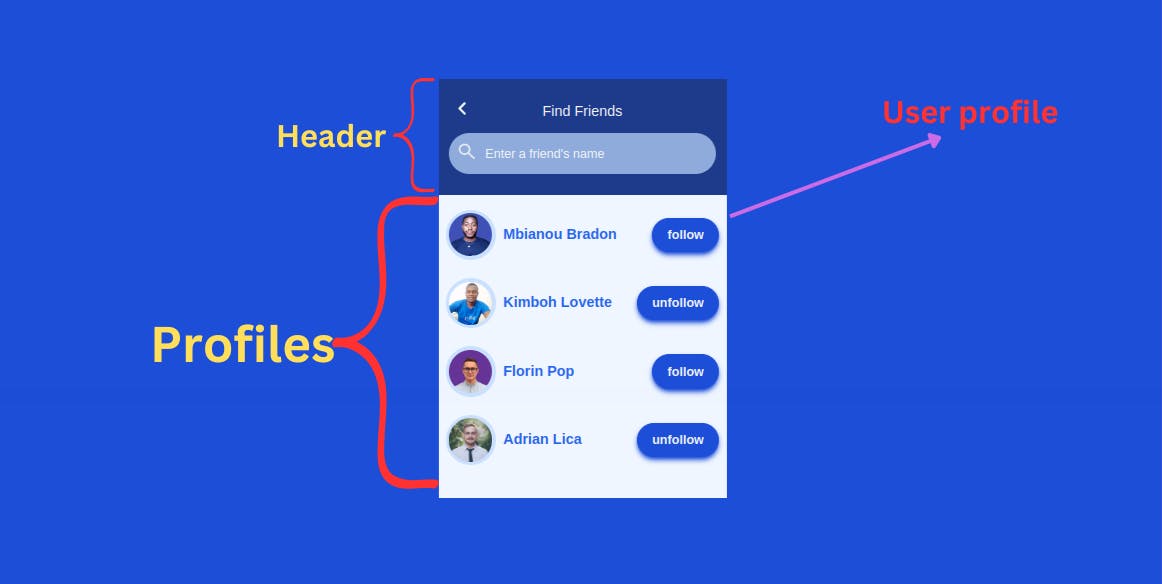
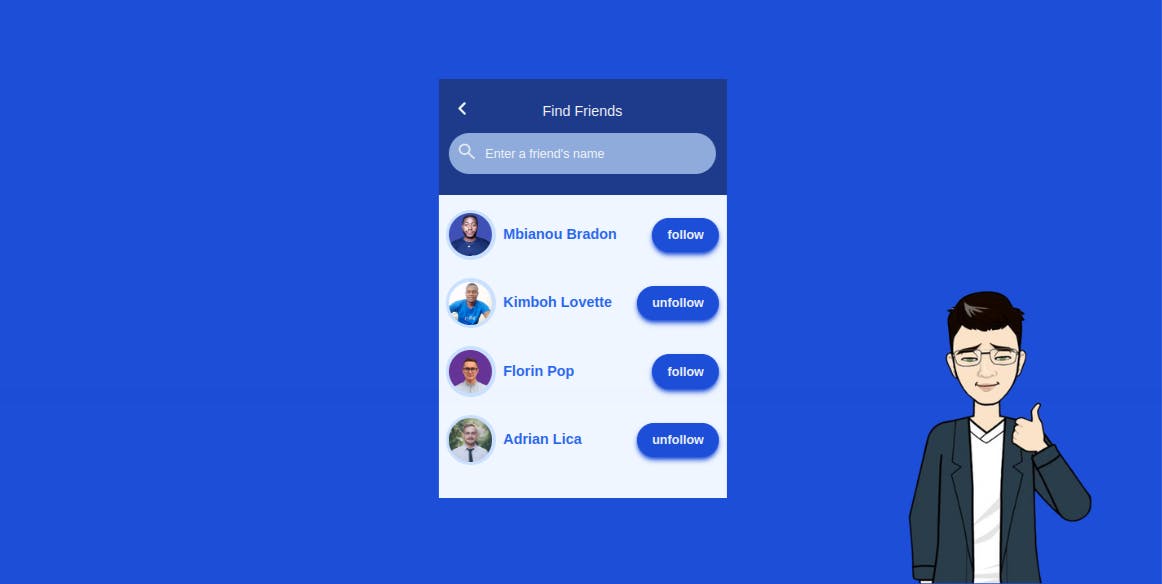
As discussed earlier on, our HTML code will have our interface and a container to hold our social profiles.
As always, we have the code, then have detailed explanations immediately after it.
<body class="bg-blue-700 flex items-center justify-center min-h-screen">
<!-- First Layer -->
<div class="w-[20rem] sm:max-w-[22rem] [&_*]:transition-all [&_*]:ease-linear [&_*]:duration-200">
<!-- Second Layer -->
<div>
<!-- Main Container -->
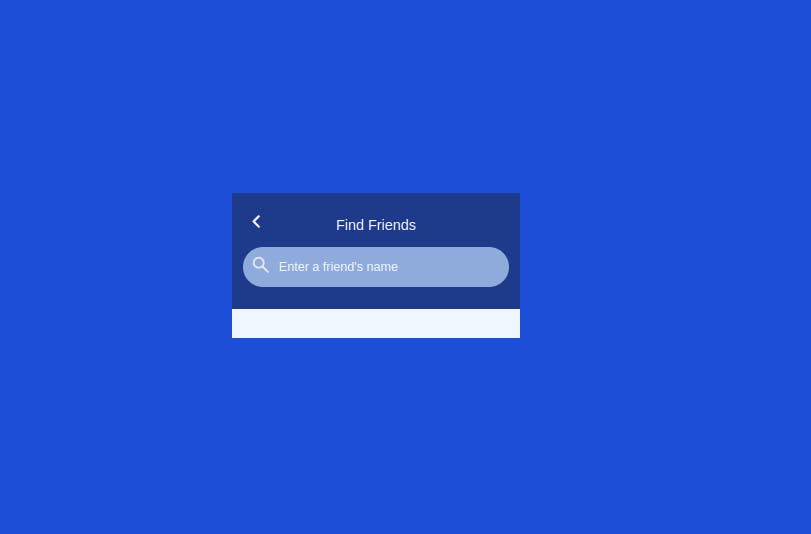
<div class="bg-blue-900 py-6 px-3">
<!-- Header -->
<div class="flex w-full relative items-center justify-center text-slate-100 mb-3">
<div class="text-3xl absolute left-0 hover:text-4xl cursor-pointer ">
<iconify-icon icon="material-symbols:chevron-left-rounded"></iconify-icon>
</div>
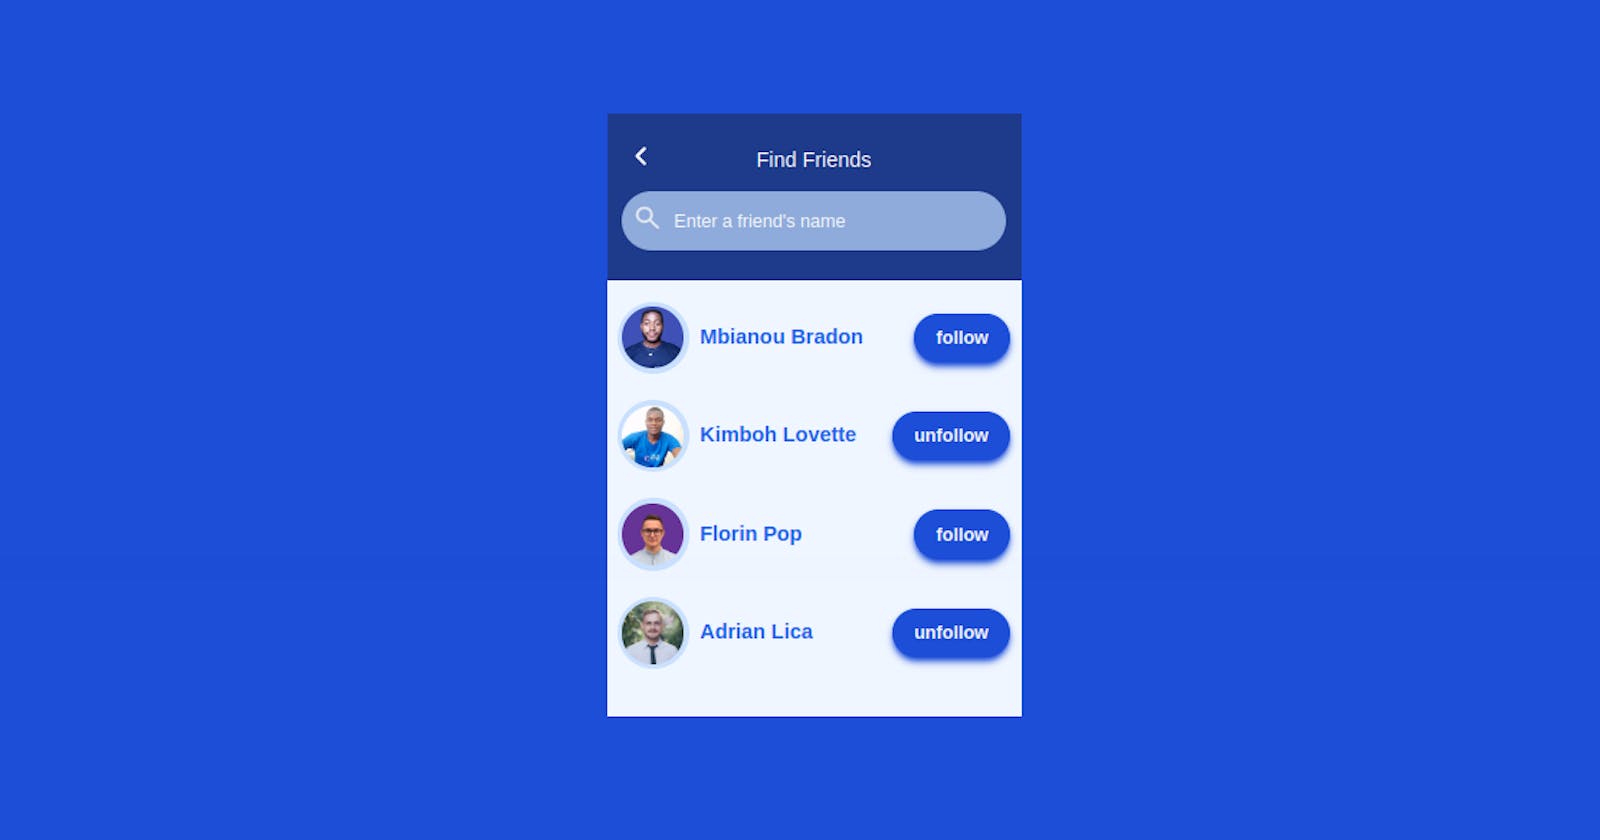
<h2 class="text-center">Find Friends</h2>
</div>
<!-- Search Bar -->
<div class="flex items-center bg-blue-200/70 rounded-full text-slate-200 px-2 py-1 gap-1">
<div class="text-2xl pt-1">
<iconify-icon icon="material-symbols:search-rounded"></iconify-icon>
</div>
<input type="text" name="search" id="search" placeholder="Enter a friend's name" class="focus:rings-0 border-0 focus:border-0 focus:outline-none text-sm bg-transparent placeholder:text-slate-100 pl-1">
</div>
</div>
<!-- Profile Container -->
<div id="root" class="py-4 px-2 bg-blue-50"></div>
</div>
</div>
<script src="https://code.iconify.design/iconify-icon/1.0.3/iconify-icon.min.js"></script>
<script src="main.js"></script>
</body>
No major styling properties applied. We principally use flex box flex, padding-inline px padding-block py and border-radius rounded-full properties to build most of the visible component
Our focus here is on the Profile container with id="root". This is the identifier we will be using as a reference to add different profiles from the JavaScript file, so it is important to remember it.
Now, let focus on a single profile. The following code is the template code we will be using for all the different profiles.
It consist of
a Profile image which accepts profileImage as paramenter
Profile details, which accepts userName as paramenter
Follow button: This is the button when clicked, you now follow the user whose profile was followed. Of course you can unfollow if you change your mind
<div class="flex items-center  gap-2">
  <div class="w-14 h-14 rounded-full p-1 hover:scale-105 bg-blue-200/80 overflow-hidden">

    <img src= {profileImage} alt="" class="rounded-full w-full">
   </div>

   <div class="font-semibold text-blue-600 mr-auto">
      <h2>{userName}</h2>
    </div>


<button class="px-4 py-2 bg-blue-700 text-slate-100 rounded-full text-sm font-semibold hover:bg-white border border-blue-700 hover:text-blue-700 shadow-md shadow-blue-700">follow</button>

</div>
This should be all for the HTML and TailwindCSS part of the task.
JavaScript
As we earlier, Our Javascript file contains our profiles data, stored in an array of objects, as each user is indeed an object on programming language. And also, it contains the code to make our follow/unfollow button functional.
For our project, this is how our javascript will looks like
const root = document.getElementById("root")

//Local user Data set. Array of Objects
const userData = [
    {
        userName: "Mbianou Bradon",
        profileImage : "https://res.cloudinary.com/practicaldev/image/fetch/s--4JL5abHt--/c_fill,f_auto,fl_progressive,h_320,q_auto,w_320/https://dev-to-uploads.s3.amazonaws.com/uploads/user/profile_image/1035172/ddd0c7d5-5a6b-4191-b822-02745bea888d.png"
    },
    {
        userName: "Kimboh Lovette",
        profileImage : "https://media.licdn.com/dms/image/D4E03AQH7P9arsYmElA/profile-displayphoto-shrink_800_800/0/1671708712233?e=2147483647&v=beta&t=2zGHmVsWVcsifWCCt_FAuZr8vytcaU_nCc-twF-iWCk"
    },
    {
       userName: "Florin Pop",
        profileImage : "https://yt3.googleusercontent.com/cs7kGRac3WXF6cidW6N9cfDUEc4vYVIWdqQGL6Iuba7uwfLpFxFC0zLqbOblvSFHb1tb0QTz=s900-c-k-c0x00ffffff-no-rj"
    },
    {
        userName: "Adrian Lica",
        profileImage : "https://media.licdn.com/dms/image/C4E03AQEvvbJVGMtDWg/profile-displayphoto-shrink_200_200/0/1577999315397?e=1680739200&v=beta&t=ps3VVA6fmP-zU8pWNZg31wUrD_bTHa0vd6nGoPc2-3g"
    },

]

//Rendering the user Profiles to the DOM using template

root.innerHTML = userData.map(friend => {
    return (
        `<div class="flex items-center gap-2 mb-5">
            <div class="w-14 h-14 rounded-full p-1 hover:scale-105 bg-blue-200/80 overflow-hidden">
                <img src=${friend.profileImage} alt="" class="rounded-full w-full">
            </div>
            <div class="font-semibold text-blue-600 mr-auto"><h2>${friend.userName}</h2></div>
            <button class="btn follow_friend px-4 py-2 bg-blue-700 text-slate-100 rounded-full text-sm font-semibold hover:bg-white border border-blue-700 hover:text-blue-700 shadow-md shadow-blue-700">follow</button>
        </div>`
    )

}).join('')

// Making Follow/unfollow button funtional

window.addEventListener("click", (e) => {
    if (e.target.classList.contains("btn")) {
        e.target.classList.contains("follow_friend")
            ? (e.target.textContent = "unfollow")
            : (e.target.textContent = "follow");


        e.target.classList.toggle("follow_friend");
    }


});
As you can see, we divide our javascript code into 3 parts. The array of objects users, the section we are rendering this information through our template and the last past is how we make the button functional.
Take note we rendered our user profiles using an array method map(), and we accessed the DOM using the id="root", earlier defined in the HTML file.
That's pretty much it.
Conclusion
We just built a very beautiful, responsive and functional Followers Component.
We had the opportunity to also revise our knowledge of Vanilla Javascript and apply the power of one of the array method, map() to loop through our dataset and render them to the browser.
I hope like me you enjoyed building this wonderful component.
You can have a Live preview on Codepen or find the code on GitHub
Don’t hesitate to share with me if you were able to complete the tutorial on your end, I’d be happy to see any additions styling you added to your Pop-up.
If you have any worries or suggestions, don’t hesitate to leave them in the comment section! 😊
See ya! 👋